CodeceptJS is the JavaScript successor of Codeception, a popular PHP, full-stack testing framework. With CodeceptJS your tests are written in Scenario format similar to Mocha specs (which is what’s powering it under the hood).
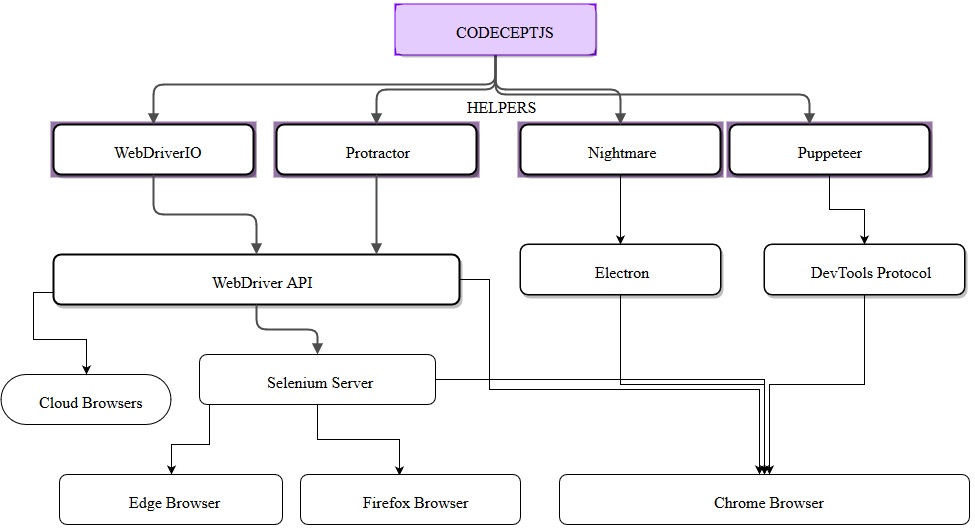
One of CodeceptJS’s “killer features” is a back end that’s Driver API agnostic meaning you can, in theory (assuming feature parity), easily switch between Protractor, WebdriverIO, NightmareJS, Puppeteer and Appium. This ability is provided by Helpers that act as a middle-man between CodeceptJS and the supported testing frameworks, abstracting the specific implementation details away from your tests.
CodeceptJS also executes test commands in a synchronous manner by wrapping all actions in promises and using a global promise chain. This makes it much simpler to use (especially for JavaScript newcomers unfamiliar with async) and the tests are cleaner and easier to maintain. You can still assign return values from commands using await too.
codeceptjs architecture (codecept.io)
Some other features of CodeceptJS include:
- Interactive Shell - Control the browser in real-time with the API of CodeceptJS. Click buttons, fill fields, try different locators inside a running test
- Page Object classes that can be injected into your Spec/Tests
- Web & Mobile Testing - Write your tests for web and and mobile applications using same API
- Cucumber-like BDD - Automate business scenarios as you do in CucumberJS without the overhead of maintaining steps
- Beautiful Reports - Integrated with Allure reporter and others
- Headless Tests - Run tests headlessly without Selenium using Puppeteer or NightmareJS
- No Flaky Steps - Flaky steps to be retried automatically
- Multi-Session Testing - Run a test using several browser windows
- CSS/XPath Locators - Locate elements by semantic values, CSS or XPath. Generate locators using Locator Builder
- Parallel Testing - Tests are split into chunks and executed in multiple processes
- Data Management - Create and delete tests data using REST API. Generate seed data using rosie and faker libraries
- Open Source - Hosted on GitHub, MIT Licensed with friendly community
An example
To help demonstrate CodeceptJS, I’ve created a repository on github with a very simple example using Puppeteer, TypeScript and Mochawesome for reporting.
Once you’ve cloned the repository, run the following from the command line to install the dependencies and then execute the tests (assuming that you already have NodeJS v8.9+ & npm installed):
1 | npm i |
The configuration for CodeceptJS is maintained within the e2e/codecept.conf.js file and specified within the npm run script via the “codeceptjs -c” flag. I’ll usually create multiple config files to run the tests on different environments such as on my local machine with mocks or on an existing end to end environment (e.g. UAT) remotely with a cloud service like Sauce Labs.
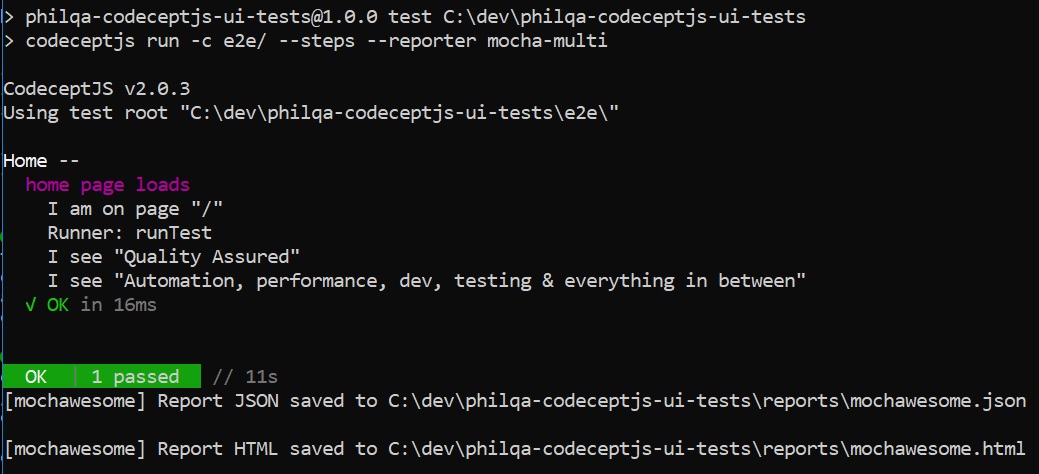
As the tests are running, you’ll see the progress output to the command line reporter.

When the test suite has finished, a mochawesome html report and junit report will be generated under the /reports folder too.

For more information and a detailed explanation of the topics covered in this article, I recommend reading the CodeceptJS Quickstart guide as well as their documentation.
In the next article of this series I’ll dive into using CodeceptJS with mocks and leveraging the parallel execution capabilities for much faster test suite execution. In the future I also hope to cover integration with cloud testing services like Sauce Labs.
